I actually like to binding by hand, but my hands are not a big fan anymore. My age is catching up to me, and with the amount of binding that needs to be completed I can't do it anymore.
Now I have wonderful binding fairies, that help me out. I find that I feel like I am imposing on people when I ask.... I know that really is more about me... but it is how I feel.
So over the last several months I have been practicing different techniques that people have share about machine binding.
Celia has been a binding fairy for me since the beginning of Iowa Comfort. She has mastered the technique. Unlike most machine binders, she applies the binding to the front of the quilt. Just like you would if you were going to hand stitch it down.
Just like this example. Make sure to give that binding a little refresh with the iron before the next step. You want it crisp.
Jan also does machine binding, and although she applies it to the back of the quilt top. Her tip for the corners is to make sure that you iron your fold over. Once you complete that it should look like the picture above. This is the first step to those perfect corners.
Now this next tip is mine. I use a contrasting thread in the bobbin. I really want that so see that stitch line on the back of the quilt.
Celia's secret weapon. Yes its glue. I bought glue at the local quilt shop for this purpose. Unfortunately the arthritis in my hands prevent me from having the strength to use the bottle. Or I just forgot to properly clean it after using, and now it is all gummed up...either way I can't use it. So my solution was to pick up a bottle of Elmers.
Very carefully I apply a thin layer of glue between the edge of the quilt top and the bobbin thread. NEVER OVER THE BOBBIN THREAD. Working with about 12 inches of the binding at a time, I fold the binding just past the bobbin thread. Then I hit it with an iron to set it into place. Repeat the process until you have the entire side of the top tacked down. I also find it easier to work from right to left in this step.
After you have one whole side glued down, take it to the sewing machine and stitch in the ditch from the front of the quilt. to get Jan's perfect corners, start stitching right at the quilt top and sew to the end of the quilt top. For this technique you are not going to stop at that quarter inch mark. Your stitch line should be just a couple of threads into your binding on the back.
I find that my stitch line is always better if I am wearing my glasses. LOL
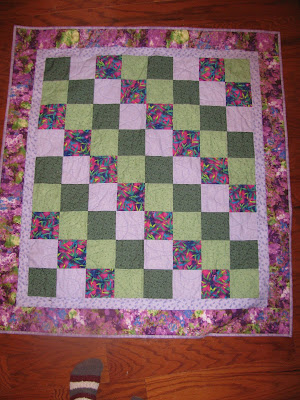
Here is the quilt all bound and ready for donation. This technique has really saved my hands, and I have many completed quilts ready for donation.
I believe these quilts will be a little more durable and will stand up to washing a little better than my hand stitched bindings. That is the hope at least.
So thank you Celia and Jan for the tutelage, and the patience in teaching this old dog a new trick.


No comments:
Post a Comment